Regular Campaigns
Regular Campaigns are one-time email communications sent to one of your lists. You can use Regular Campaigns to send a promotion, an announcement or one-time offer.
Getting Started
To create a new campaign:
- Go to Messaging > Campaigns.
- Select Create New from the Campaigns page.
- Name your campaign by selecting New Campaign at the top of the page.

- Select the Regular campaign type.
NOTE: For more information on what you can do with campaigns, including all Campaign types and prerequisites, see the Campaign Overview page.
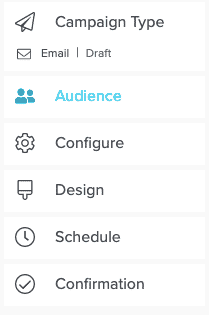
After creating your new campaign and choosing the Regular Campaign type, you'll see the menu on the left which will guide you through next steps. You can always use this menu to move to any section if you need to add information in a different order.
Use the following links to jump directly to the sections on this page:
Audience
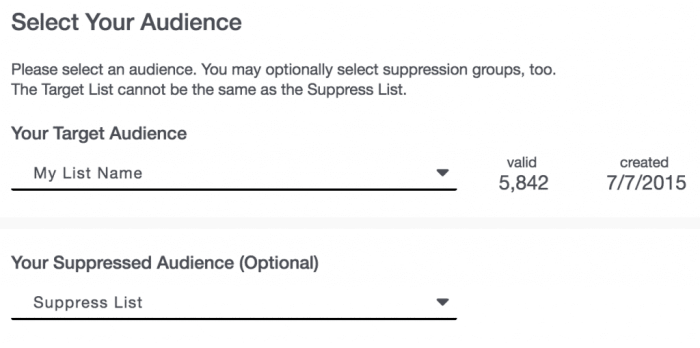
In this section, you will choose the audience for your email by setting a target list, and, optionally, a suppression list-users who should be excluded from the send. If you need to use multiple suppression lists, please reach out to your Customer Success Manager to enable this capability. (To read more about how to create, manage, grow, and track lists, see the Lists Creation section of the Audience Overviewdocumentation pages.)
To select your target Audience and Suppression Audience
- On the Audience page, set the list that will receive your email by clicking the drop-down under Your Target Audience.
- Once you choose Your Target Audience, you will have the option to exclude recipients via the Your Suppressed Audience drop down.
- The number of valid emails refers to the number of valid emails on a list, minus hard bounces or optouts. See the User Engagement Levels page for more information. If you're using a Natural List, Createdwill show the date it was created.
Campaign Retargeting
Retarget users of a prior campaign to increase engagement with your messaging. Tailor your message to user behavior or resend the existing message to users who didn't open.
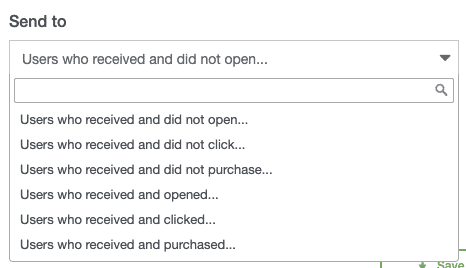
You can retarget campaigns to:
- Users who received and did not open
- Users who received and did not click
- Users who received and did not purchase
- Users who received and opened
- Users who received and clicked
- Users who received and purchased
Note: There are some limitations to campaign retargeting:
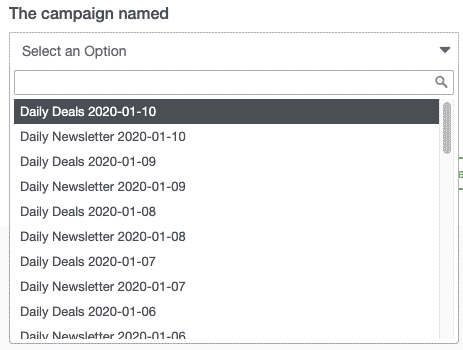
- Only the last 1000 campaigns with a schedule time in the last 60 days are shown for retargeting.
- Campaigns using Campaign Retargeting are not reflected in Campaign Engagement Reports.
- Checks will not look back more than the last campaign. In a series, for example, only the 2nd message will be checked in a series of three. The first message will not be checked.
- A/B and Recurring campaigns are not currently supported.
Set Up a Retargeting Campaign
Set up a retargeting campaign within the campaign workflow. To show the retargeting options, select Prior Campaign from the Audience section of the Campaign Builder.
Note: The retargeting options within the campaign workflow do not automatically take into account real user interaction vs. interaction by email providers and privacy software. To create an audience that does, use the Audience Builder button in the Campaign Detail Report, then filter for subscribers who did not have a real open or click on that message.
- Set your Send to option.
- Select the campaign you'd like to retarget.
- Save your work and continue to finish creating your campaign.
Configure
In this section of the campaign setup, you'll enter the foundational information for your email, including the template; basic information such as the email's From Name, Email Subject and Reply-To Email; and choose the Data Feedand/or Ad Plan, if you're using one.
Select a Template and Mode
On the Configure page, choose your template if you have not already done so.
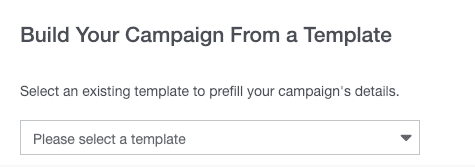
If you have selected a template with unsaved changes, you will be prompted to review and save them. Unsaved changes will not be sent.
Any changes made to your template after you schedule your send will not be included. You must unschedule the send, make changes, and then reschedule the send to include updates or changes in your template.
Template Mode
There are two template modes to choose from when you're using a data feed in your messaging: Dynamic or Static. See Add a Data Feed for more information on using data feeds in your messaging.- Dynamic - The recommended option. Selecting Dynamic creates campaign content from your selected feed at send time.
- Static - Create editable content from your selected data feed immediately. This gives you the option to edit the data feed content that appears in your messaging.
Enter Campaign Details
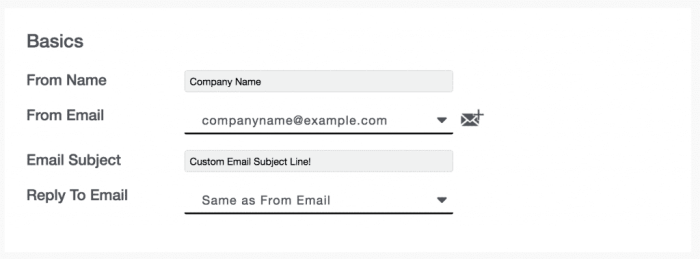
Enter the basic information for the campaign including:
- The From Name and From Email that will display for recipients.
- Email Subjectfor the email messages.
- Reply-To Emailto which recipients can respond.
NOTE: Clicking the envelope icon allows you to add a verified email that you have already added to the system for verification.
Add a Data Feed, Promotion, or Ad Plan (Optional)
Data feeds can supply your email messages with content to display, such as the latest articles or products on your site. The platform utilizes the following feed types, which should contain your product or content URLs:
- Content Feeds are supplied by Personalization Engine, which gathers users' interests based on website activity.
- You provide URLData Feeds, which may be generated by your content management system. It is recommended that you add these to your feeds page in the platform so that the system can cache them and make them easy to access within your templateor campaign. JSON format is recommended.
Note: The URL will convert into a Sailthru data feed when the campaign is saved and will display such ashttps://feed.sailthru.com/ws/feed?id=66c2695cc613d13dde057a32. - Merged Feeds contain multiple Content and/or URL data feeds, which is merged into a single feed for you.
See the Data Feeds Overview documentation page for more information, and note that your template must be coded to support the display of data from a feed (see Use Feeds and Content Data in Templates).
To insert a unique, single-use promotion code in each message, configure a Promotion, then select the name of this promotion from the drop-down.
See the Ad Targeter Setup documentation page for more information on the Ad Plan feature.
Frequency capping
Frequency capping limits the number of marketing messages that can be sent to a subscriber. Rules are set globally on the account level through your account settings. For more information about global frequency capping rules, see the Frequency Capping documentation.
If you wish to exclude a message from the frequency capping rules you've set, select the checkbox to exclude the message.

Design
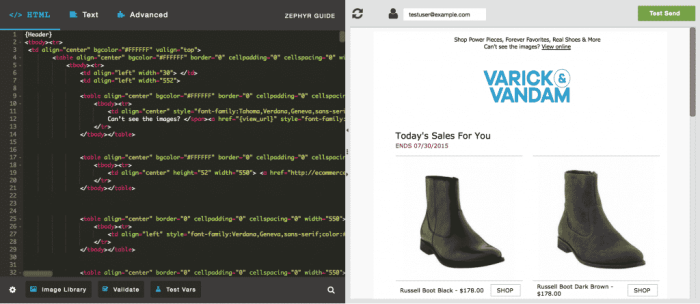
On the Design page, you can create or modify the code and other static content for the body of the email message. If you have selected a template (which is a best practice), its code is displayed, and you can choose to make manual edits for this campaign send. If you haven't selected a template, you can create the body from scratch or paste in HTML that you built outside of the platform. A preview of the email content as it would appear for a selected user is displayed in the right pane. The preview updates based on your code/content changes.Design or Preview Email Content
On the Design page, you will see the code editor on the left and a preview of the email produced by that code on the right. The preview displays content-both subject line and message body-as it would appear for the user whose email address is entered in the box above. You can modify the HTML as needed. The preview will update automatically, within seconds of each code edit.
- To preview the content as a different recipient/user, enter a different email address above the preview and click
 .
. - To edit the subject line, click

- To send a test email with the current code, click Test Send. You will then be prompted to enter the email address that will receive the test send. Note that optout links will not render in the test email.
Under the Text tab, you can create a plain text version of your email. Click Convert from HTML and the text of your email will render in plain text, along with a preview. You can also choose to make manual edits to this text-only copy.
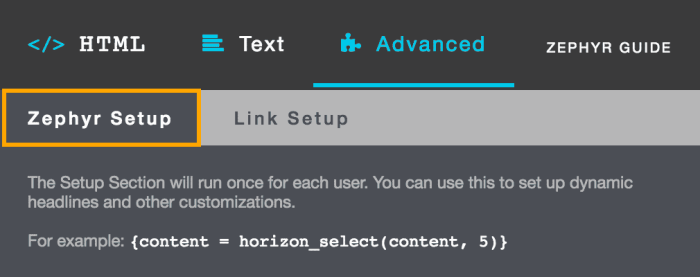
Also, above the HTML viewer are your Advanced options:
- The Zephyr Setupsection will run once for every recipient before their email is sent, allowing you to prepare and manage user data, feed content, etc., prior to generation of the message body. This is especially useful for preparing dynamic email, where content differs per user. See the Using Zephyr section below for more information.
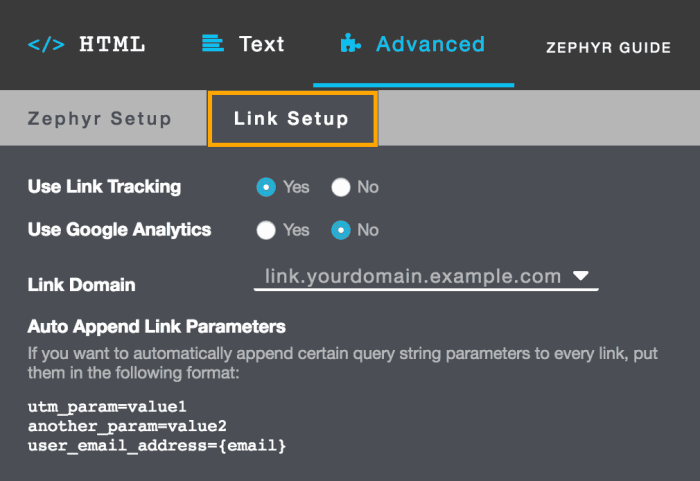
- Link Setup allows you to indicate whether you'll be tracking links and/or using Google Analytics to measure what happens on your site after a user opens and clicks within your email.
Email Client Test
Test your email templates across 70+ email clients and browsers with the Email Client Test tool.
- See a high level view across different categories:
- Web
- Mobile
- Application
- Click in to see specific preview details
Follow the steps below to generate previews for a campaign:
- Open the campaign you want to test in Email Client Test.
- Navigate to the Design section of the Campaign Builder.
- Select Email Client Test from the menu bar.

Email Client Test will open in a new tab. - Check the Campaign Name, Subject Line, and number of tests allowed before you click the Run Test button.
- View your test results.
Using Zephyr
For Regular Campaigns, you can use HTML to create static content, and Zephyr for dynamic content that is generated at the time of the campaign send, and may differ for each recipient.Zephyr is the coding language used in email subject lines and campaign Templates to increase customization. For example, Zephyr is used to incorporate data feeds to populate the Template with your latest content and to call variables associated with user's profiles, such as their geolocation to ensure relevancy for each recipient of the email.
See the For Developers documentations pages for more information on using Zephyr for email campaigns. You can also click Zephyr Guidefrom the Design page in the platform (next to the Advanced tab) to access the Zephyr Syntax Overview documentation.
Note: It is a requirement to give users the ability to opt out of your campaigns. It is recommended that you include an opt-out link by using the {optout_confirm_url} Zephyr snippet, which produces a user-specific link to your opt-out page. If you do not include this snippet, the system will automatically append a link at the end of each message pointing to your optout page. It is also a best practice to track opens through a beacon, an image that helps track email opens.
Viewer Options and Image Library
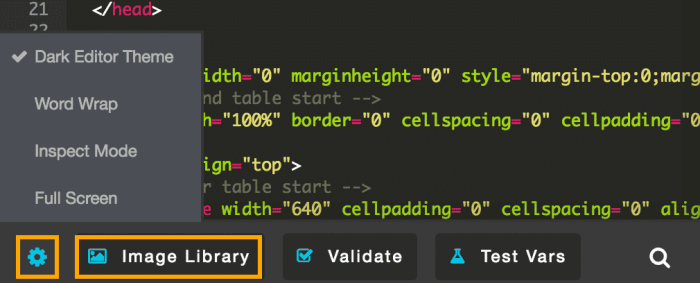
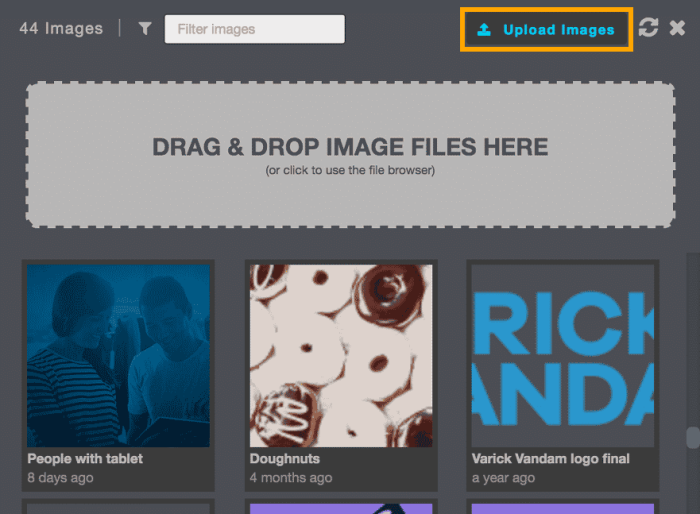
You can adjust your viewing options by clicking the cog icon at the bottom of the HTML viewer. This is also where the image library is located. Images you upload are available to you for all emails you design. When deleted from an email, they remain in the library for use in other emails.
You can easily bulk upload images by dragging and dropping from your desktop or a folder into the Image Library.
Schedule
When and how your email sends is critical in getting a response from your audience. There are multiple options that let you control the send date and time to reach your audience when your content is most relevant and valuable, including Personalized Send Time and Recipient's Local Time.
All options show your account's current location, date, and time.Scheduling Your Campaign
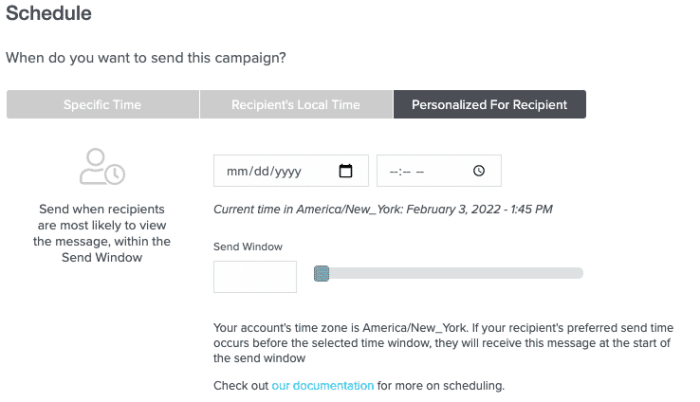
On the Schedulepage, set up all options around how and when your email will be sent.There are three options available for scheduling your campaign send: Specific Time, Recipient's Local Time, and Personalized for Recipient.
Specific Time
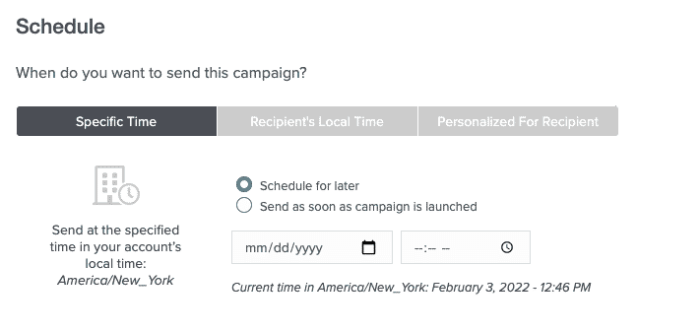
Selecting Specific Time allows you to send your campaign as soon as it's launched or to schedule your campaign to send later.- Send as soon as campaign is launched - This option allows you to send a campaign as soon as you click Schedule on the Confirmation page.
- Schedule for later - Select a specific future date and time to send your campaign.
Recipient's Local Time
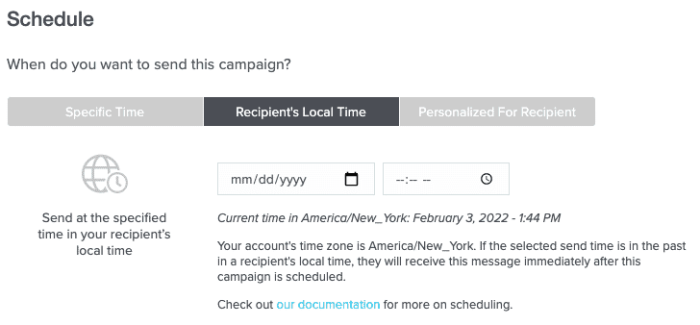
Select Recipient's Local Time to ensure your messaging is received at the same time across time zones. This uses the recipient's local time zone, based on clicks, instead of the default Sailthru account timezone.
For example:
- A marketer in New York (Eastern Time) schedules a campaign for Tuesday at 12PM with Recipients Local Time selected.
- Recipients in California will receive it at 12PM on Tuesday, local time. Without this feature, they would receive the message at 9AM local time. The same is true for receipts in any time zone across the world.
Local Time Zone is powered by clicks; not opens, and is therefore unaffected by Apple's Mail Privacy Protections introduced with iOS 15, iPadOS 15, and macOS Monterey.
Note the following two exceptions- When a recipient's local time is in the past relative to when the Campaign is initially scheduled, they will receive the message immediately.
- We determine the recipient's local time by referencing their geolocation whenever they click a link inside a message sent by the system. When a recipient has yet to click any such link, we default to the time zone set in your account settings.
Personalized Send Time
Choose Personalized Send Time to optimize engagement by sending emails to individuals when they are most likely to interact with it based on their email interaction history.
For example, if you choose to send your email starting at 9:00 a.m. with a 16-hour send window, the email will be sent to each user at the time between 9:00 a.m. and 11:00 p.m. when they are most likely to engage with it within that window.Confirmation and Seed Emails
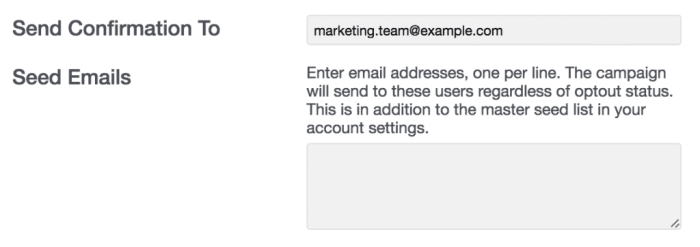
Enter the Confirmation Email for the individual(s) who should receive an email when the campaign completes sending, including a confirmation of completion and total emails sent. To enter multiple confirmation email addresses, separate using a comma.
Enter the Seed Emails to which a copy of the campaign email should be sent. Note that this will send to the email address(es) regardless of their opt-in status. If an address is already entered as a Global Seed Email address, you do not need to enter it here. Even if a campaign is scheduled for a Local Send Time or a Personalized Send Time, seeds will send immediately.
Selective Campaign Seeding
Monitor deliverability and gain insight into inbox placement for your campaigns. Unlike auto seeding, which seeds a predetermined number of campaigns at random each week, selective seeding enables you to choose which campaigns to seed.
No additional pool of seeds is required; selective seeding pulls from the same pool as automatic seeding. If selective seeding is enabled on your account, you can find the option in the Schedule section of the Campaign Builder.

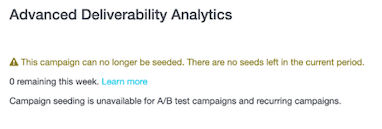
When you add selective seeding to your campaign, you'll see the status of your ability to seed.
If you have seeds available
If you have no seeds available
If you had seeds available when you set up the campaign but have since used them all
Add Selective Seeding to Your Campaign
Selective seeding is quick to enable from the Schedule section of the Campaign Workflow.- Create your campaign and select your audience.
- Configure your campaign.
- Design your template or use an existing template. Move to Schedule.
- Under Advanced Deliverability Analytics, select Seed campaign to enable selective seeding.

- Schedule your campaign or send it immediately.
- Seeding is only effective with big campaigns. Any list smaller than 10,000 users will not be seeded.
- Selective seeding pulls from the same pool of seeds as auto seeding.
- When selective seeding is enabled, only the campaigns you explicitly select for seeding will be seeded. None of your campaigns will be auto seeded.
Confirmation
The Confirmation section provides you with an opportunity to review a summary of the settings you've chosen for your campaign prior to scheduling it.
Notes:
If you're sending to a recipient using the Recipient's Local Time option, you'll see a blue bar at the top of the Summary page that displays the approximate send time start based on the target audience location.
Sending progress is reflected in real time. Other metrics, like opens, clicks, and revenue, will become available 2 to 6 hours after sending begins.
If you have scheduled your campaign to send On Confirmation, a pop up will appear to confirm and give you the option to schedule for a later date.
You can always return to edit any section of your campaign either prior to the send time or while it's in the process of sending.
If you need to adjust a setting once a campaign has begun sending, you can pause your campaign to do so. To pause a campaign that is currently sending, click Sending Folder, hover over the Campaign and hit the pause button.
Tip:Review all of your campaign details presented on this page prior to clicking Schedule. Try reading this page from the bottom up, or printing to review on paper. Changing the order or method in which you've previously reviewed information can help you to find errors or items that need updating.
Send via the API
To send a campaign using the API, make a POST request that includes:
- A campaign name
- The sending list
- A scheduled date and time for sending
- The template
- Optionally, any variables you wish to pass
{
    "name" : "Re-engagement Campaign",
    "list" : "Recently Disengaged Users",
    "schedule_time" : "10/15/2012 3pm EST",
    "copy_template" : "Re-engagement Template",
    "vars" : {
        "daily_banner" : "http://www.example.com/assets/images/dailybanner.png"
    }
}
